


A spreader bar is a rigid structural member used in rigging to horizontally separate lifting slings, preventing them from converging inward and compressing the load. By keeping sling legs spread apart, the bar transfers compressive forces along its length while the slings remain in tension, protecting load geometry during the hoist.
This guide covers how each capacity tier differs, how to select the right bar for your lift, what rentals cost across the 20, 50, and 100 ton range, which industries rely on each capacity, and what safety, inspection, and documentation requirements apply before any bar goes into service.
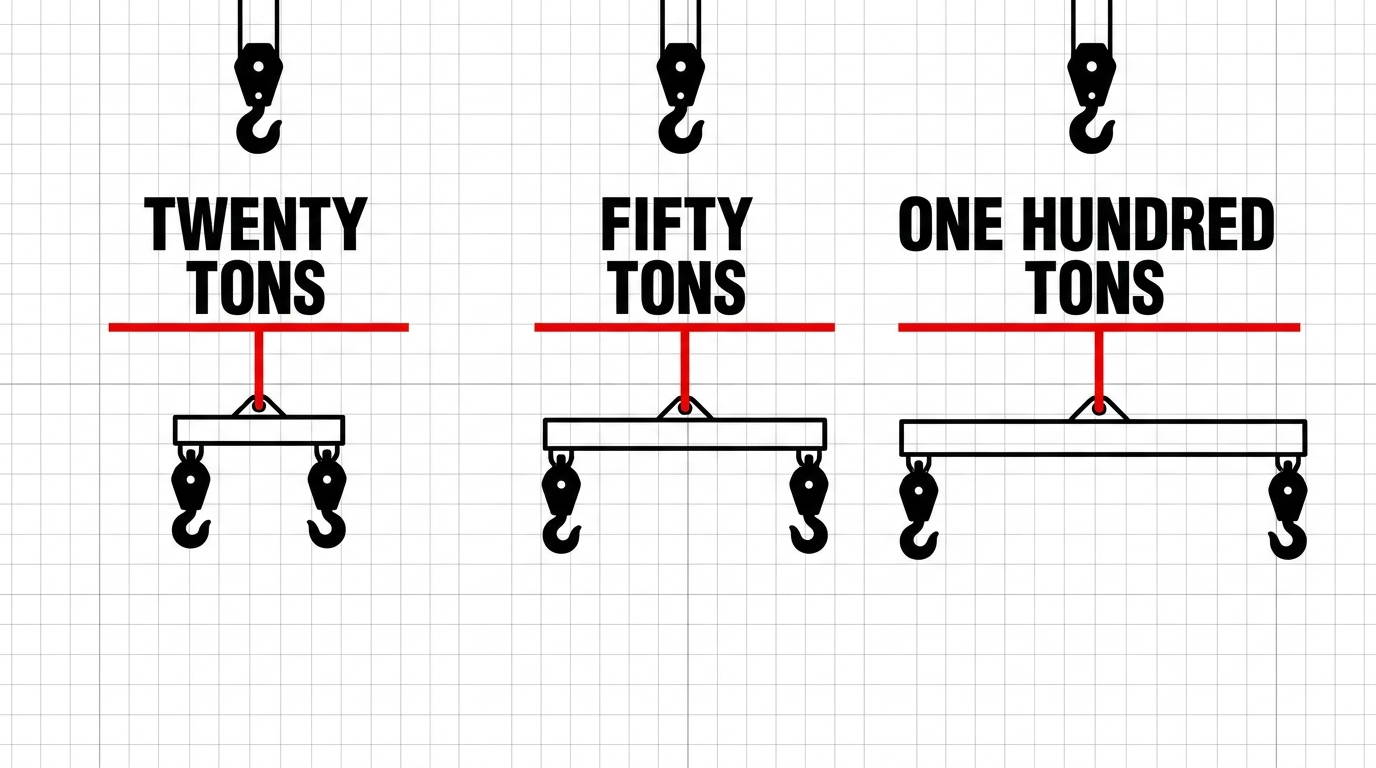
The three capacity tiers serve fundamentally different lift scenarios. A 20 ton bar handles light industrial and fabrication work; a 50 ton bar is the workhorse of mid-range infrastructure and manufacturing lifts; a 100 ton bar is reserved for the heaviest civil, energy, and structural projects where engineering review is required before the lift proceeds.
Rental pricing varies significantly by capacity and region, with daily rates spanning from roughly $89 for a 20 ton bar in lower-cost markets to $500 or more per day at the 100 ton level in heavy industrial metros. Selecting the right capacity also means accounting for sling angle, because capacity is drastically reduced when the top sling angle drops below 45 degrees regardless of the bar’s rated tonnage.
Safety and compliance obligations are shared between the rental provider and the end user, with ASME B30.20 proof testing, OSHA daily inspection requirements, and certified documentation all playing a defined role before any lift begins.
What Is a Spreader Bar and How Does It Work in Rigging?
A spreader bar is a rigid structural member used in rigging to horizontally separate lifting slings, preventing them from converging inward and compressing the load. By keeping sling legs spread apart, the bar transfers compressive forces along its length while the slings remain in tension, protecting load geometry and structural integrity during a hoist.
How a Spreader Bar Functions Under Load
A spreader bar functions by converting inward sling compression into axial compressive force along the bar itself. Without it, angled slings would squeeze a load from both sides, risking deformation or collapse. The bar absorbs that lateral force, allowing vertical lift to transfer cleanly through the rigging system. According to ENSER, spreader bars are designed for pure compression, and capacity is drastically reduced when the top sling angle drops below 45 degrees. Maintaining proper sling angles is not optional; it is a physics constraint built into every rated capacity calculation.
What Components Make Up a Spreader Bar System
The primary components of a spreader bar system are the main beam or strut, end fittings or shackle connections, and upper rigging hardware such as slings or chains connecting the bar to the crane hook. Many systems also include drop links below the end fittings to provide vertical adjustment for uneven load geometry. Each component carries a share of the total load, so every element must be rated to match or exceed the working load limit of the bar itself.
Where Spreader Bars Are Used in Industry
Spreader bars are used across construction, manufacturing, steel production, and utility infrastructure projects where long or structurally sensitive loads require controlled, damage-free lifts. Common applications include hoisting steel beams, precast concrete panels, HVAC equipment, and industrial machinery. A 15-ton bridge crane equipped with a 2,500-pound I-beam spreader bar, for example, is used in grain handling operations to transfer loads weighing over 17,600 pounds, illustrating how spreader bars serve across varied industrial environments.
What Are the Key Differences Between a 20, 50, and 100 Ton Spreader Bar?
The key differences between a 20, 50, and 100 ton spreader bar involve load capacity, physical size, lift geometry, and rigging hardware. Each capacity tier serves distinct lift scenarios across construction, utilities, and heavy industrial applications.
How Does Load Capacity Differ Between a 20, 50, and 100 Ton Spreader Bar?
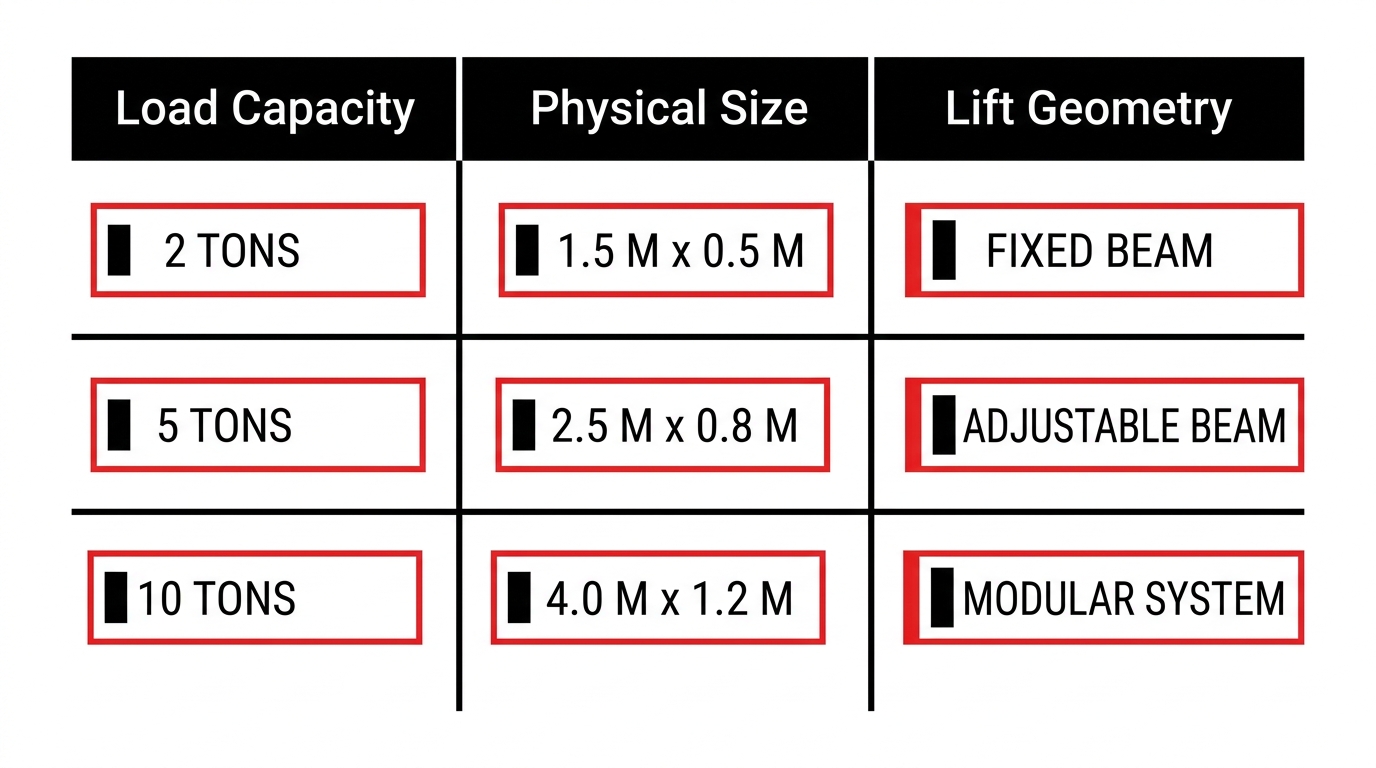
Load capacity differs between a 20, 50, and 100 ton spreader bar in direct proportion to their rated working load limits, but geometry plays an equally critical role. Spreader bars are designed for pure compression, and capacity is drastically reduced if the top sling angle falls below 45 degrees. A 20 ton bar handles moderate industrial loads, a 50 ton bar suits mid-range structural lifts, and a 100 ton bar manages the heaviest rigging jobs. According to Tandemloc, adjustable spreader beams span working load limits from 2,000 pounds up to 100,000 pounds, illustrating the full range available. Maintaining correct sling angles is just as important as selecting the right rated capacity.
How Does Physical Size and Weight Vary Across These Three Capacities?
Physical size and weight vary significantly across the three capacity tiers. Higher-rated bars require heavier end units, larger strut sections, and more robust structural steel to handle increased compressive forces. A 20 ton bar is comparatively compact and manageable on-site, while a 50 ton bar demands heavier rigging hardware and more crane headroom. A 100 ton bar is substantially larger, requiring careful transport planning and dedicated lifting equipment just to position it. Rigging teams often underestimate the bar’s dead weight contribution to the overall lift plan, and this oversight can compromise crane capacity calculations before the payload is even attached.
How Does Lift Geometry Change Between a 20, 50, and 100 Ton Bar?
Lift geometry changes between a 20, 50, and 100 ton bar primarily because larger bars span greater horizontal distances, directly affecting sling angles and vertical headroom requirements. A wider span reduces inward compression on the load but demands longer top slings and greater crane hook height. Smaller 20 ton bars work well in confined vertical spaces, while 100 ton bars often require tall crane configurations to maintain safe sling angles above 45 degrees. Getting geometry wrong at higher capacities multiplies both load path stress and risk of load instability far more than at lighter ratings.
How Do Attachment Points and Rigging Hardware Differ by Capacity?
Attachment points and rigging hardware differ by capacity in shackle size, load pin diameter, and lifting lug construction. A 20 ton bar uses comparatively smaller shackles and lower-rated wire rope slings, while a 50 ton bar requires mid-range rated hardware throughout the rigging assembly. A 100 ton bar demands large-bore shackles, high-capacity synthetic or wire rope slings, and reinforced end fittings engineered specifically for the rated load. Mismatching hardware to bar capacity is one of the most common rigging errors on heavy lifts, making component-level compatibility checks essential before any lift begins.
How Do You Know Which Spreader Bar Capacity Is Right for Your Lift?
The right spreader bar capacity depends on your verified load weight, lift geometry, and job site constraints. The sections below identify the defining criteria for each capacity tier: 20 ton, 50 ton, and 100 ton.
When Is a 20 Ton Spreader Bar the Right Choice?
A 20 ton spreader bar is the right choice when your total rigged load falls below 40,000 pounds and your lift involves standard industrial components such as HVAC units, fabricated steel assemblies, or mid-weight machinery. This capacity suits job sites where overhead clearance is limited, since lighter bars require smaller crane picks and shorter rigging setups. The 20 ton range also fits projects where multiple lifts occur throughout the day, because the reduced component weight speeds rigging changes between picks.
Key selection criteria for a 20 ton bar:
- Verified load weight does not exceed 20 tons, including rigging hardware.
- Top sling angle is maintained at 45 degrees or greater to protect rated capacity.
- Lift points on the load are spaced for a standard-length bar, typically under 20 feet.
- Crane capacity comfortably covers the combined load and rigging weight.
When Is a 50 Ton Spreader Bar the Right Choice?
A 50 ton spreader bar is the right choice when your load falls in the 20 to 50 ton range and involves heavy industrial equipment such as pressure vessels, large transformers, bridge sections, or precast concrete panels. This mid-range capacity bridges the gap between light fabrication lifts and full heavy-lift operations, making it the most frequently specified size across construction, petrochemical, and utility sectors. The 50 ton bar handles wider load footprints and longer lift point spans that would overstress a 20 ton bar.
Key selection criteria for a 50 ton bar:
- Rigged load weight falls between 20 and 50 tons.
- Lift attachment points are spread wide enough to require a longer bar span.
- The crane’s rated capacity at the required radius supports the combined load and rigging.
- Load geometry is relatively symmetric, with no extreme center-of-gravity offset.
For most general heavy-lift projects, the 50 ton bar offers the best balance of capacity and manageable component weight. It is often the most practical choice when load weight estimates carry any uncertainty.
When Is a 100 Ton Spreader Bar the Right Choice?
A 100 ton spreader bar is the right choice when your rigged load exceeds 50 tons or involves large-span lifts such as industrial modules, offshore structures, stadium components, or full bridge girders. At this capacity, rigging hardware, bar weight, and sling geometry all require engineering review before the lift proceeds. Spreader bars are designed for pure compression, and at 100 ton ratings, even minor sling angle deviations below 45 degrees can drastically reduce safe working load.
Key selection criteria for a 100 ton bar:
- Total rigged load approaches or exceeds 50 tons, with a safety margin built in.
- Lift requires a long bar span to protect the load from inward sling compression forces.
- A licensed rigger or engineer has verified load weight, center of gravity, and attachment point integrity.
- The operating crane is rated for the full combined weight at the planned radius and configuration.
Choosing a 100 ton bar when a 50 ton bar would suffice adds unnecessary component weight and cost. Matching capacity precisely to load requirements is always the safer and more economical decision.
How Much Does It Cost to Rent a Spreader Bar by Capacity?
Spreader bar rental costs vary by capacity tier, with heavier-rated bars commanding significantly higher rates. The sections below break down typical pricing for 20 ton, 50 ton, and 100 ton rentals across daily, weekly, and monthly terms.
How Much Does a 20 Ton Spreader Bar Rental Typically Cost?
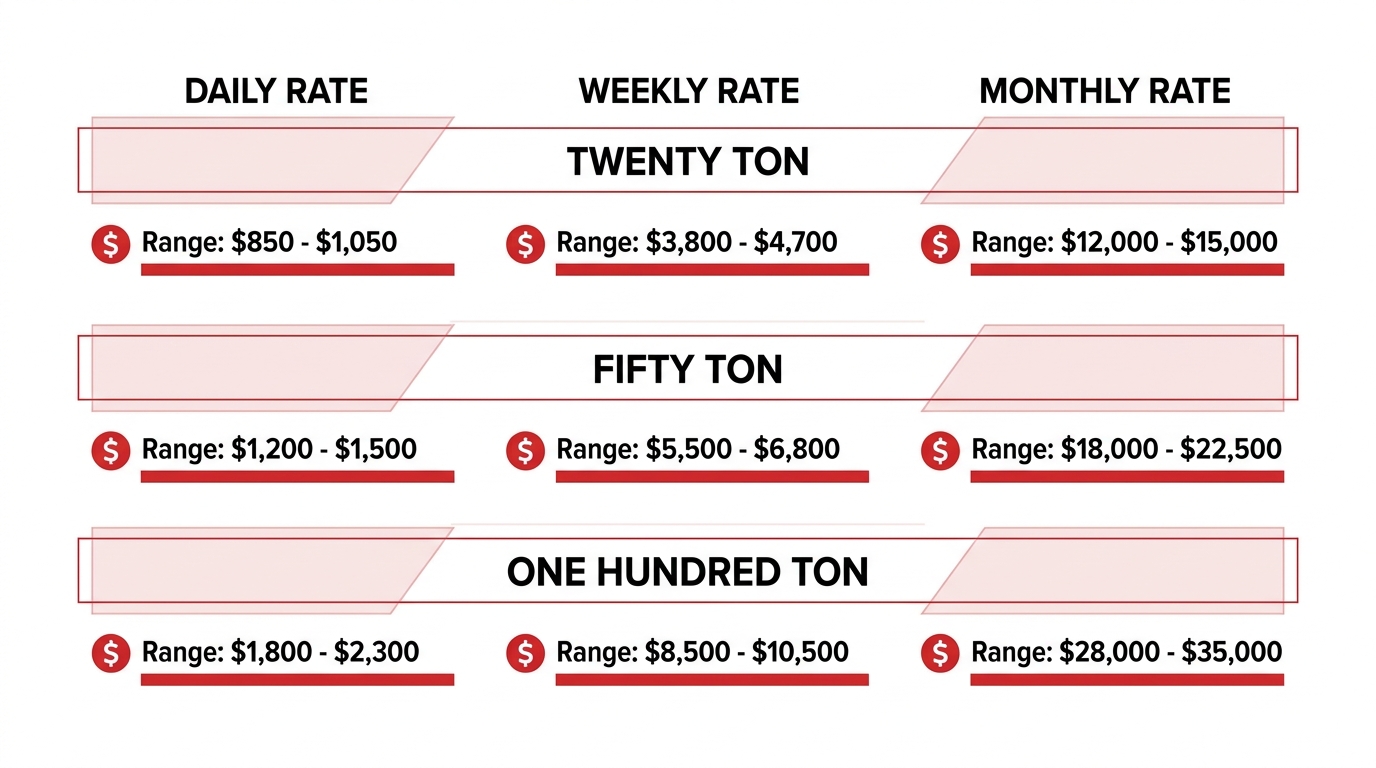
A 20 ton spreader bar rental typically costs between $89 per day, $180 per week, and $357 per month in markets like Denver, according to 2026 pricing data from CountBricks. In higher-demand metros such as Los Angeles, rates rise to $150–$300 per day, $600–$1,200 per week, and $2,000–$4,000 per month. Geographic location, rental duration, and local equipment availability are the primary factors driving that range. For shorter project windows, daily rates offer the most flexibility, while monthly terms deliver the best per-day value.
How Much Does a 50 Ton Spreader Bar Rental Typically Cost?
A 50 ton spreader bar rental typically costs more than a 20 ton unit, reflecting the heavier steel construction, larger end fittings, and more demanding handling requirements. Rates generally range from $250–$500 per day, $900–$1,800 per week, and $3,000–$5,500 per month, depending on the region and supplier. Higher-capacity bars require more logistics coordination, which can add to the total rental cost. Requesting a quote directly from a supplier with national inventory, such as Tway Lifting, typically yields more accurate pricing than published rate sheets.
How Much Does a 100 Ton Spreader Bar Rental Typically Cost?
A 100 ton spreader bar rental typically carries the highest rate tier due to the substantial weight, specialized transport, and limited inventory availability. Expect daily rates in the range of $500–$1,200, weekly rates of $1,800–$4,500, and monthly rates of $6,000–$12,000 or more for heavy industrial markets. At this capacity level, pricing often includes consultation, certified documentation, and delivery logistics as part of the rental package. Locking in a monthly rate is often the most cost-effective strategy for extended projects requiring this capacity.
What Industries Commonly Rent Spreader Bars at These Capacities?
The industries that commonly rent spreader bars at 20, 50, and 100 ton capacities span construction, energy, manufacturing, maritime, and heavy infrastructure. Each sector demands specific capacity ranges based on load type, lift geometry, and site conditions.
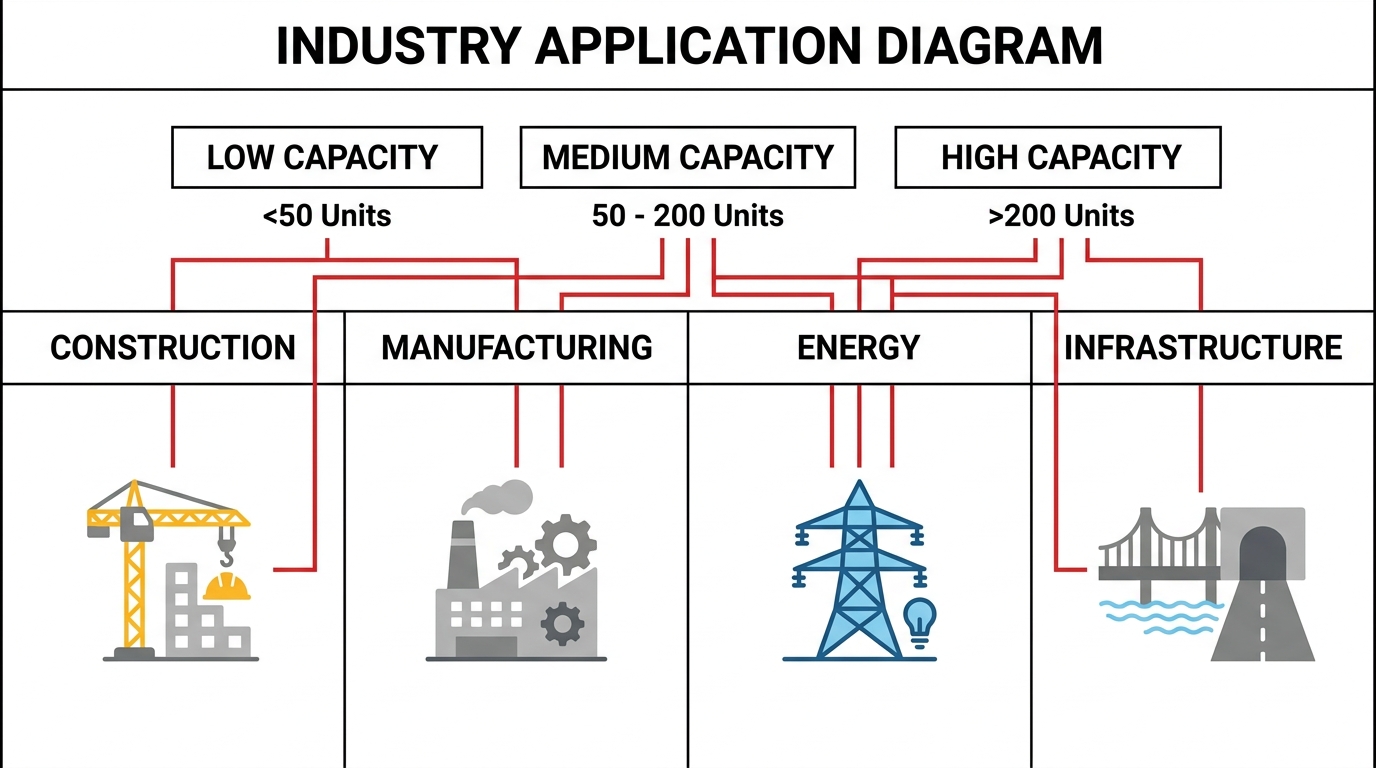
Which Industries Use 20 Ton Spreader Bars Most Often?
The industries that use 20 ton spreader bars most often include general construction, automotive manufacturing, and light industrial facilities. These sectors routinely handle structural steel components, machinery, and fabricated assemblies that fall within the 20 ton range. Automotive plants, for example, use 20 ton bars to position large stamping dies and powertrain assemblies where controlled horizontal load distribution prevents damage to precision equipment. For most plant maintenance and mid-size construction contractors, a 20 ton bar covers the majority of everyday lifts without the overhead of heavier gear.
Which Industries Use 50 Ton Spreader Bars Most Often?
The industries that use 50 ton spreader bars most often include oil and gas, bridge construction, steel fabrication, and utility infrastructure. These sectors regularly lift large pressure vessels, precast concrete segments, transformer banks, and structural trusses that exceed 20 ton limits. Steel mills and power generation facilities depend on 50 ton capacity bars to move heavy rolls, reactor components, and turbine assemblies. This capacity tier is the workhorse of heavy industrial lifting, covering a wide range of project types across energy and infrastructure.
Which Industries Use 100 Ton Spreader Bars Most Often?
The industries that use 100 ton spreader bars most often include offshore energy, shipbuilding, heavy civil construction, and mining. These sectors handle the heaviest single lifts in industry: offshore platform modules, ship hull sections, large mining equipment, and major bridge girders. Shipyards use 100 ton bars to balance asymmetrical loads during hull assembly, while mining operations apply them to position large crusher and grinding equipment. At this capacity, specialized rigging knowledge and certified equipment are non-negotiable requirements for safe operations.
What Safety and Compliance Requirements Apply to Spreader Bar Rentals?
Safety and compliance requirements for spreader bar rentals span OSHA regulations, ASME certification standards, and clearly defined responsibility chains between rental providers and end users. The following H3 sections cover applicable OSHA standards, load testing requirements, and compliance accountability.
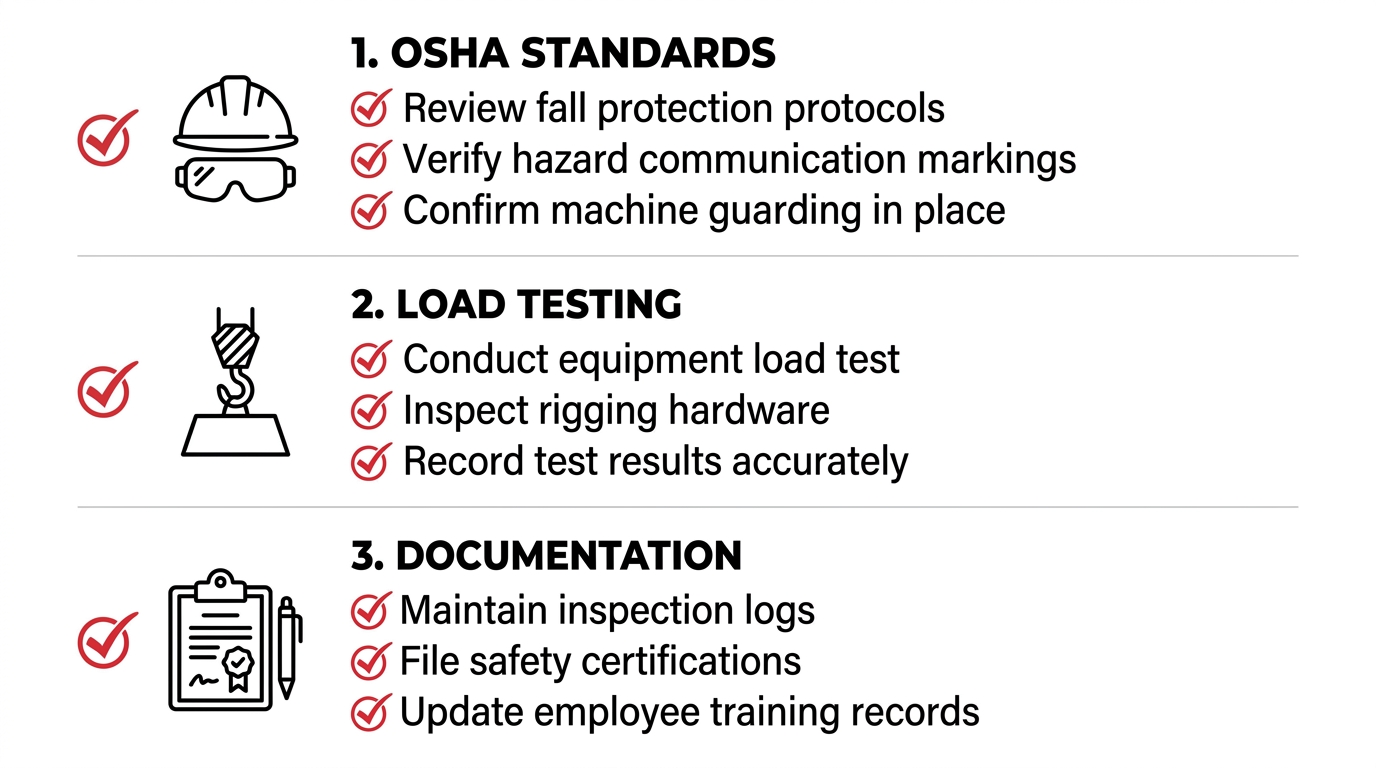
What OSHA Standards Apply to Spreader Bar Use on Job Sites?
The OSHA standards that apply to spreader bar use on job sites include regulations governing worker positioning and daily equipment inspection. OSHA standard 29 CFR 1918.81(k) requires that employees stay clear of areas beneath overhead drafts or descending lifting gear. Additionally, OSHA standard 29 CFR 1917.45(k)(1) mandates that designated persons visually inspect each crane and derrick on each day of use for defects in functional operating components. Spreader bars, as below-the-hook lifting devices, fall within the scope of these inspections. Skipping daily visual checks is one of the most commonly overlooked compliance steps on active job sites, and it exposes contractors to serious liability.
What Load Testing or Certification Should a Rental Spreader Bar Have?
The load testing certification a rental spreader bar should have includes proof testing to a minimum of 125% of the rated load. According to ASME B30.20, this initial proof test applies to all below-the-hook lifting devices and establishes the verified working load limit for the equipment. Before accepting a rental unit, request documentation confirming this test was completed and that the bar carries a current load rating tag or certification record.
Who Is Responsible for Safety Compliance on a Rented Spreader Bar?
Responsibility for safety compliance on a rented spreader bar is shared between the rental provider and the end user, though distinct duties apply to each party. The rental provider is responsible for supplying equipment that meets ASME B30.20 proof testing standards and carries current certification. The end user, typically the contractor or lift supervisor on site, is responsible for daily visual inspection, proper rigging configuration, maintaining safe sling angles, and ensuring workers stay clear of suspended loads per OSHA requirements. Understanding this shared accountability before the lift begins is the clearest way to prevent compliance gaps on complex projects.
What Should You Inspect Before Using a Rented Spreader Bar?
Before using a rented spreader bar, you should perform both a physical visual inspection and a documentation review. The sections below cover the specific visual checks to complete on the equipment itself and the paperwork that must accompany any compliant rental unit.
What Visual Checks Should You Perform on a Rental Spreader Bar?
The visual checks you should perform on a rental spreader bar include examining the main beam, end fittings, attachment points, and load-bearing surfaces for damage. Look specifically for:
- Cracks, bends, or deformation along the beam body
- Corrosion, pitting, or surface degradation at welded joints
- Worn, elongated, or damaged pin holes and shackle attachment points
- Missing, loose, or illegible capacity markings and warning labels
- Any signs of overload history, such as permanent deflection in the beam profile
OSHA standard 29 CFR 1917.45(k)(1) mandates that designated persons visually inspect each crane and lifting device on each day of use for defects in functional operating components. Inspecting before every lift, not just before the rental period begins, is non-negotiable on compliant job sites.
What Documentation Should Come With a Rental Spreader Bar?
The documentation that should come with a rental spreader bar includes a load test certificate, proof of rated capacity, and an inspection record from the rental provider. OSHA references real-world scenarios involving spreader bars, such as a 15-ton bridge crane equipped with a 2,500-pound I-beam spreader bar lifting 17,636 pounds of bagged grain, to illustrate why verified load ratings and matching documentation are critical before any lift begins. At minimum, confirm the rental unit includes:
- A current load test certificate showing the equipment has been tested to rated capacity
- Manufacturer specifications listing the working load limit and any de-rating conditions
- A completed pre-rental inspection report signed by a qualified person
Without these records, you cannot confirm the bar’s rated capacity matches your lift requirements, which creates both a compliance gap and a safety risk.
What Accessories or Rigging Components Are Needed Alongside a Spreader Bar?
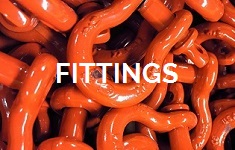
The accessories and rigging components needed alongside a spreader bar include lifting slings, shackles, and hardware sized to match the bar’s rated capacity. Each element in the rigging assembly must be rated to handle the full load, since any undersized component becomes the weakest link.
The core components typically required are:
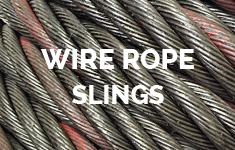
- Lifting slings: Wire rope, chain, or synthetic slings connect the spreader bar to the crane hook above and to the load below. Sling type and length determine the attachment angle.
- Shackles: Bow or screw-pin shackles attach slings to the spreader bar’s end fittings and to the load’s lifting points. Each shackle must carry a working load limit equal to or greater than the applied load share.
- Master links or rings: A master link or pear-shaped ring gathers the top slings into a single connection at the crane hook.
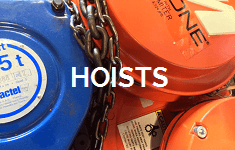
- Load cells: Load cells monitor actual load weight in real time, confirming the lift stays within the spreader bar’s rated capacity.
- Tag lines: Tag lines give ground personnel control over load rotation without placing workers beneath the suspended load, supporting compliance with OSHA 29 CFR 1918.81(k), which requires employees to stay clear of areas beneath overhead drafts or descending lifting gear.
Sling angle is a critical variable in this assembly. Spreader bars are designed for pure compression, and capacity is drastically reduced if the top sling angle is less than 45 degrees, making sling length selection as important as hardware ratings.
How Does Renting a Spreader Bar Compare to Buying One?
Renting and buying a spreader bar each serve different operational needs, with cost structure, frequency of use, and storage requirements being the primary deciding factors. The sections below cover when renting delivers better value and when ownership makes more financial sense.
When Does Renting a Spreader Bar Make More Financial Sense?
Renting a spreader bar makes more financial sense when lifts are infrequent, project-based, or require a capacity you won’t need again soon. Rental eliminates upfront capital expenditure, storage costs, and maintenance obligations. For jobs requiring a 100-ton bar used once or twice per year, rental rates in markets like Los Angeles range from $150 to $300 per day according to CountBricks (2026), making rental far cheaper than ownership for low-frequency applications.
When Does Buying a Spreader Bar Become the Better Investment?
Buying a spreader bar becomes the better investment when the same capacity is needed repeatedly across consistent, ongoing operations. If your team performs high-frequency lifts at a fixed capacity, purchase eliminates recurring rental fees and gives you immediate equipment availability without scheduling delays. Ownership also allows full customization of attachment points, length, and rigging configuration to match your exact lift geometry.
What Are the Hidden Costs of Ownership Versus Rental?
The hidden costs of spreader bar ownership include storage, periodic recertification, inspection labor, and repair expenses that accumulate over the equipment’s service life. Rental providers absorb these costs and deliver equipment that already meets certification requirements. For most contractors handling variable lift capacities across multiple projects, rental remains the more cost-efficient and operationally flexible approach.
How Do Tway Lifting’s Rental Services Support Spreader Bar and Rigging Needs?
Tway Lifting’s rental services support spreader bar and rigging needs through a full-service model: inspected equipment, certified personnel, and flexible rental terms covering 2 to 100 ton capacities. The sections below connect those services to OSHA compliance and summarize the key decisions covered in this article.
Can Tway Lifting’s OSHA-Compliant Inspection and Rental Services Support Your Spreader Bar Lift?
Yes, Tway Lifting’s OSHA-compliant inspection and rental services can support your spreader bar lift across all three capacity tiers. Tway Lifting rents spreader beams from 2 to 100 tons, with bars available up to 40 feet, alongside shackles, synthetic slings, wire rope slings, hoists, and load cells. Every rental unit is inspected by certified specialists before deployment, aligning with ASME B30.20 proof-testing requirements and OSHA job site safety standards. Founded in 1945 and ISO9001-certified, Tway Lifting brings over 75 years of rigging expertise to each rental. According to Tway Lifting’s own inspection guidance at twaylifting.com, pre-use inspection protocols are built into the rental process. Free local delivery and pickup further reduce logistical burden on job sites.
What Are the Key Takeaways About 20 Ton vs 50 Ton vs 100 Ton Spreader Bar Rental We Covered?
The key takeaways about 20 ton vs 50 ton vs 100 ton spreader bar rental center on matching capacity, geometry, and compliance to your specific lift. The most actionable conclusions from this article are:
- Capacity selection is load-driven: A 20 ton bar suits fabrication and light industrial work; 50 ton handles mid-range infrastructure and manufacturing lifts; 100 ton is reserved for heavy civil, energy, and structural projects.
- Sling angle determines real capacity: Spreader bars are designed for pure compression, and capacity drops sharply when the top sling angle falls below 45 degrees, regardless of the bar’s rated tonnage.
- Inspection is non-negotiable: ASME B30.20 requires proof testing to 125% of rated load before any below-the-hook device enters service.
- Renting outperforms buying for project-specific lifts: When a 100 ton bar is needed once per year, rental eliminates storage, recertification, and capital costs.
- Verified documentation must accompany every rental: Load test certificates, rated capacity markings, and inspection records are required before use.
Tway Lifting’s rental inventory, certified inspection services, and 75-year track record make it a reliable single source for any capacity tier across the 20, 50, and 100 ton range.